
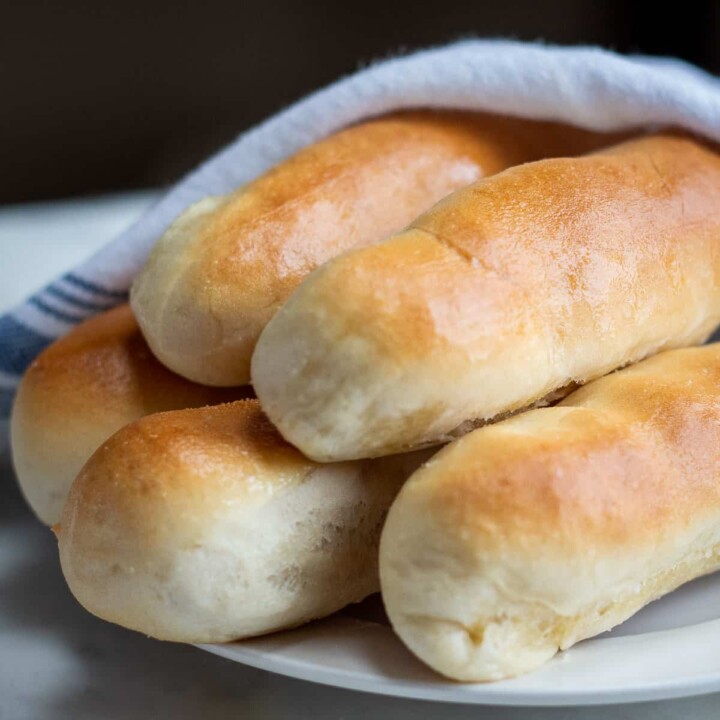
Garlic Breadsticks - Soft and chewy, these buttery, homemade garlic breadsticks are super tasty and easy to make. They are the perfect addition to any meal. So delicious!
Jump to:
They are super delicious dunked into a thick, hearty soup like our Pasta e Fagioli or Cheesy Potato Soup recipes. They're also the perfect side for Creamy Parmesan Risotto.
Looking for more bread recipes? Don't miss our Focaccia recipe. So good.
Here's What You Need
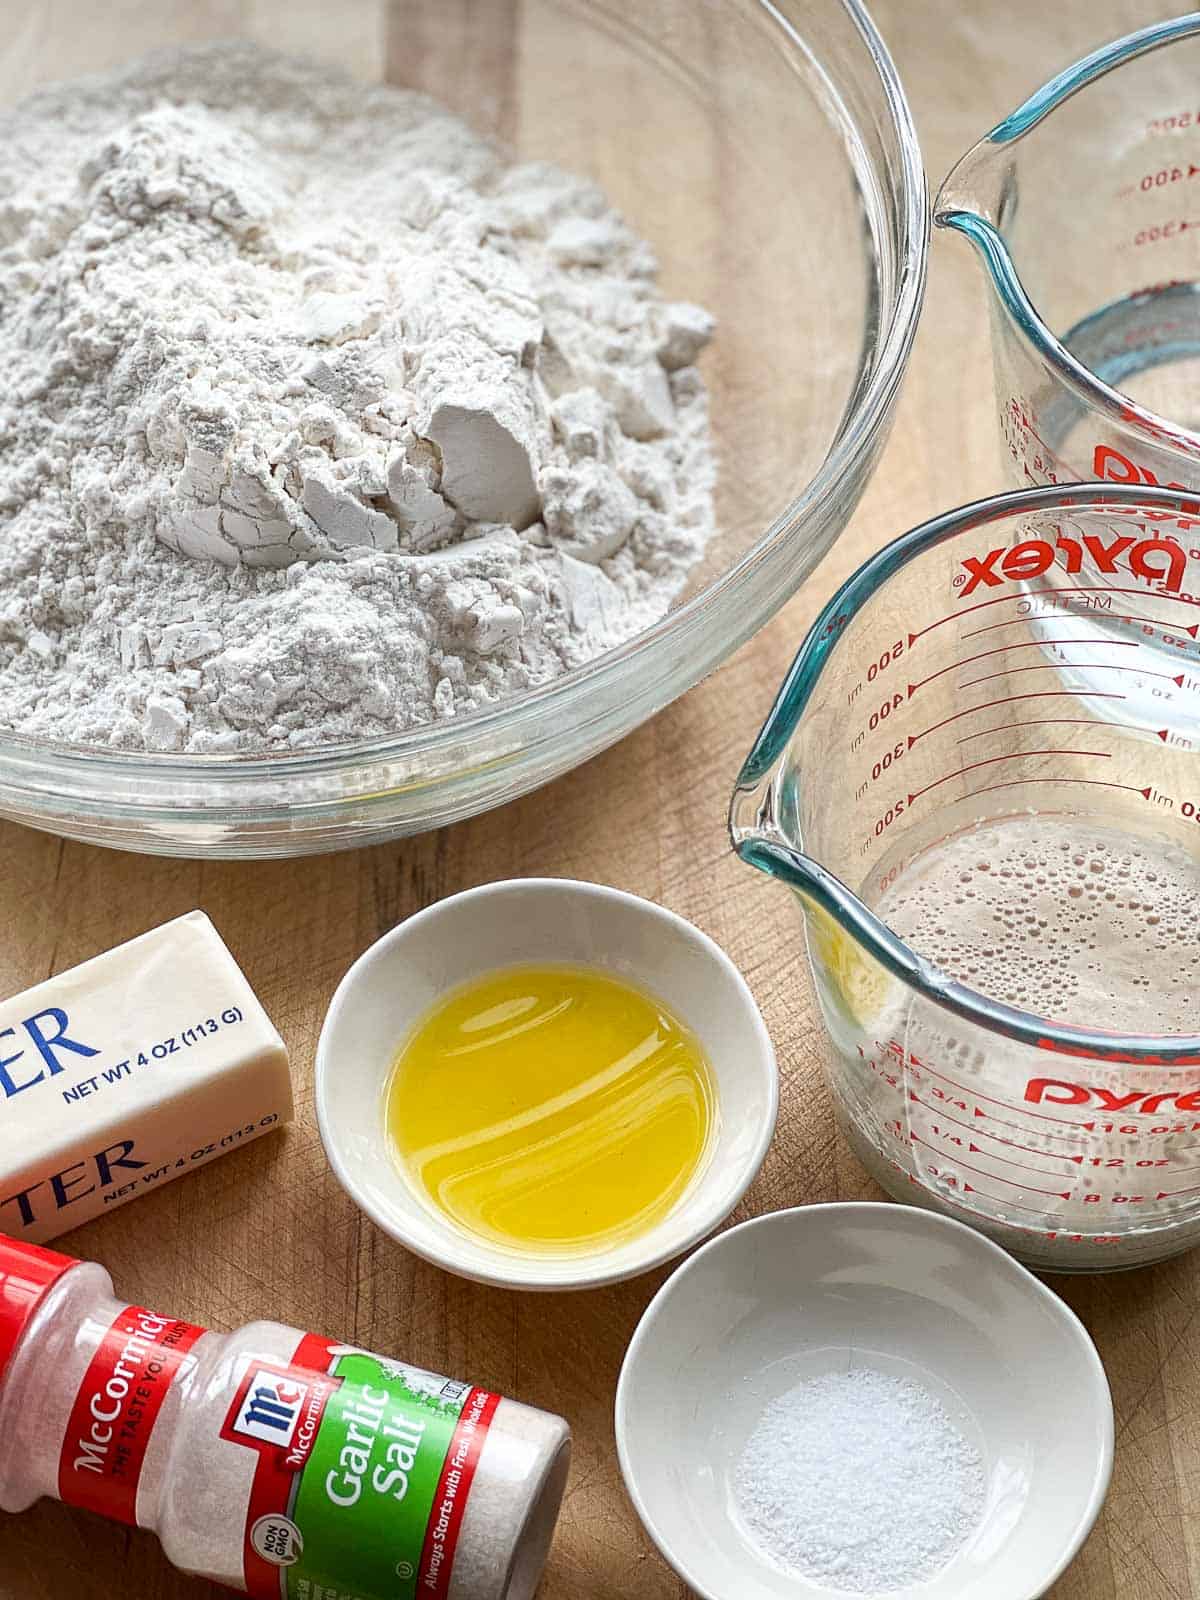
Notes on Ingredients
- Water (95-100°)
- Instant Yeast - Dissolves and activates easier (will rise faster) than active dry yeast because it has a finer grind. Either can be used; 1:1 ratio.
- Sugar
- All Purpose Flour - You may substitute bread flour.
- Salt
- Salted Butter
- Garlic Salt (Optional).
How to Make It
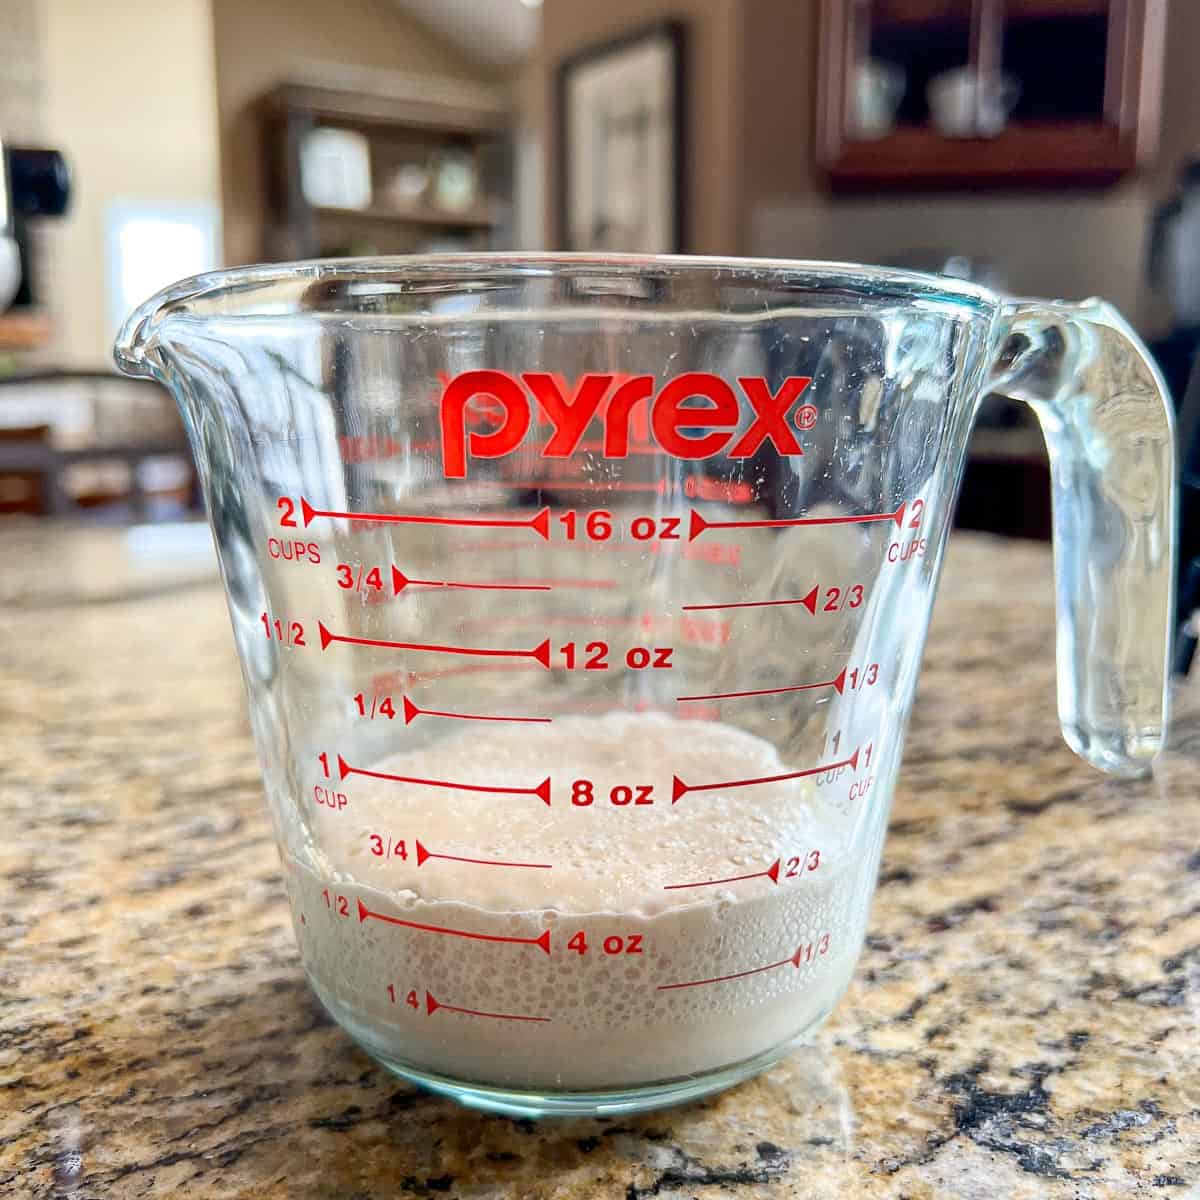
- Proof the Yeast. Make sure your yeast is alive. Active dry yeast must be proofed. However, you can skip this step if using instant yeast, as it can be added directly to the flour. I always proof my yeast so as not to mess with the liquid measurements in the recipe.
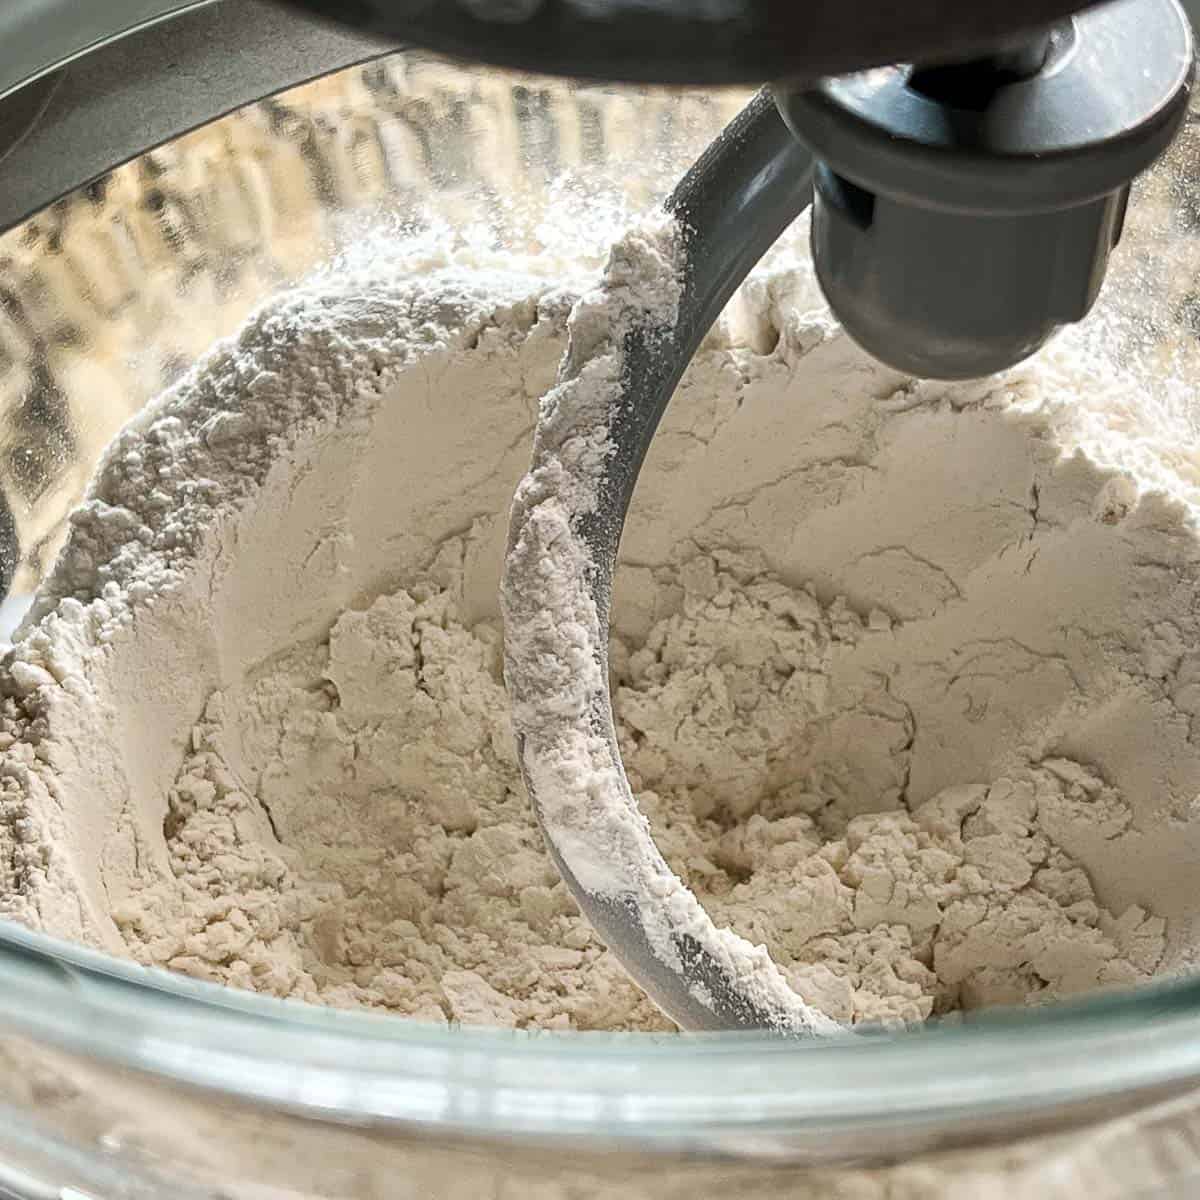
2. Make the Dough. You can use a dough hook or mix the dough by hand. Use a rubber spatula to scrape the sides of the bowl to help it come together.
3. Knead the Dough. This should take a few minutes in a stand mixer or 10 minutes if kneading by hand.
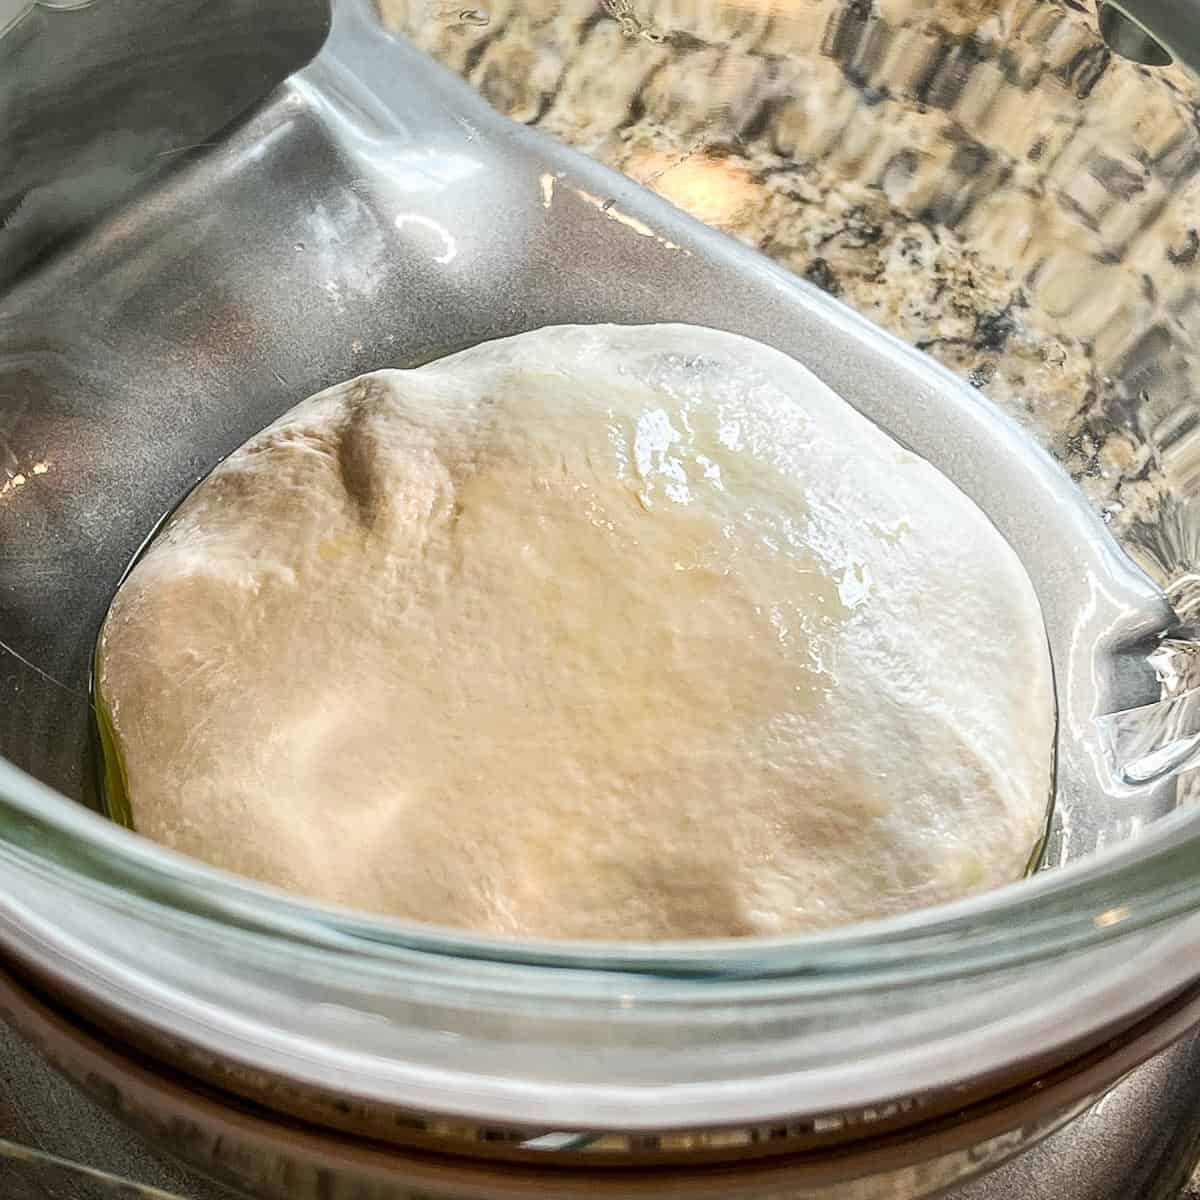
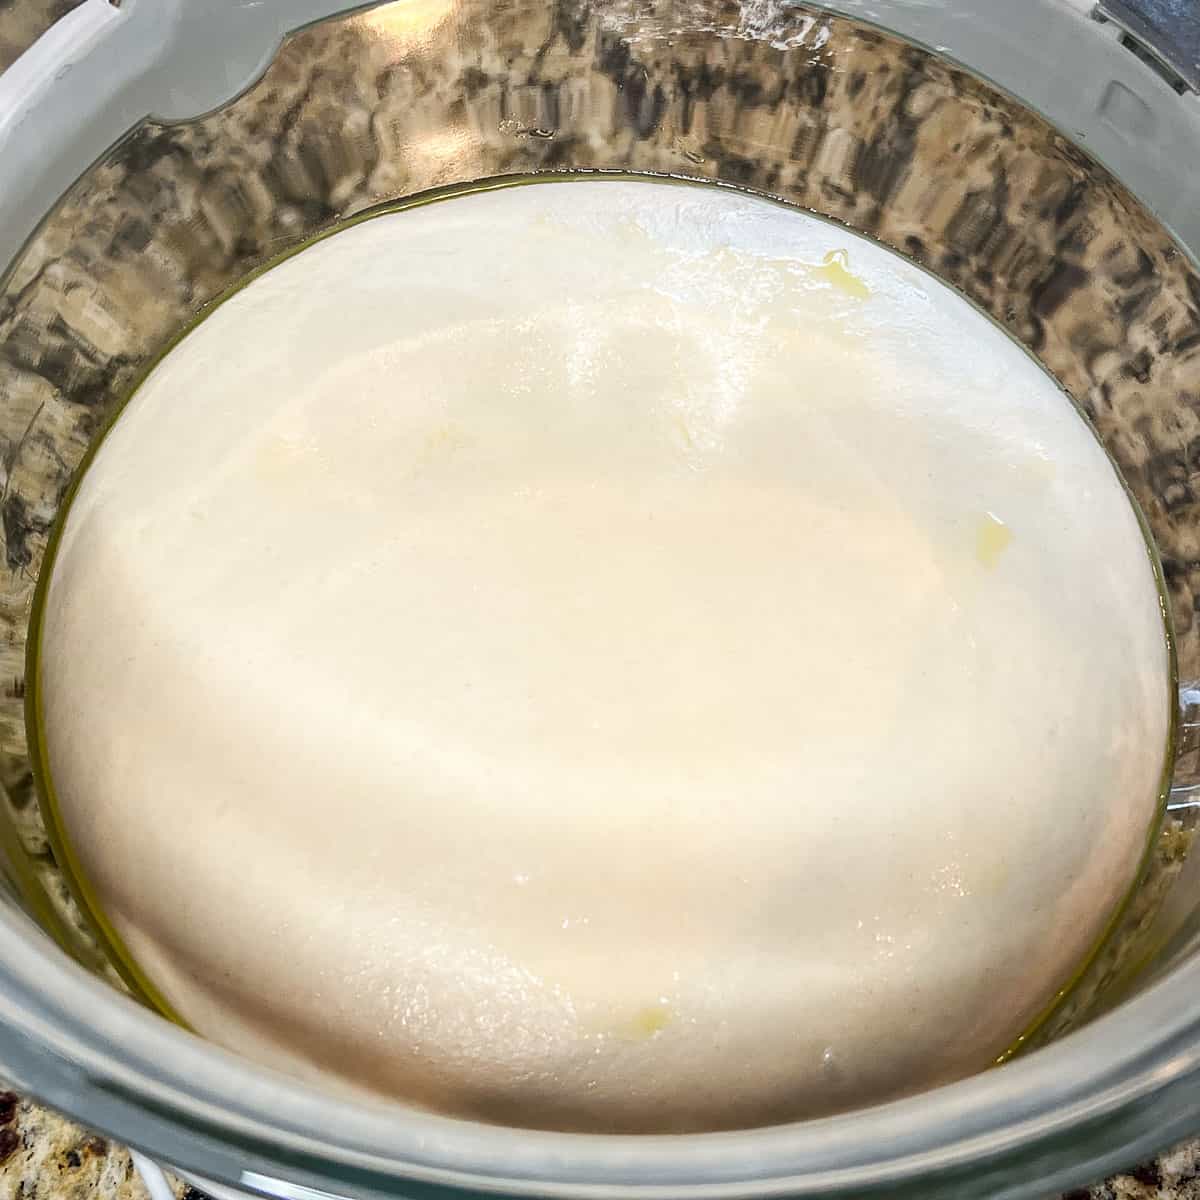
4. First Rise (60 Minutes). Cover with plastic wrap or a flour sack towel and set in a draft-free place.
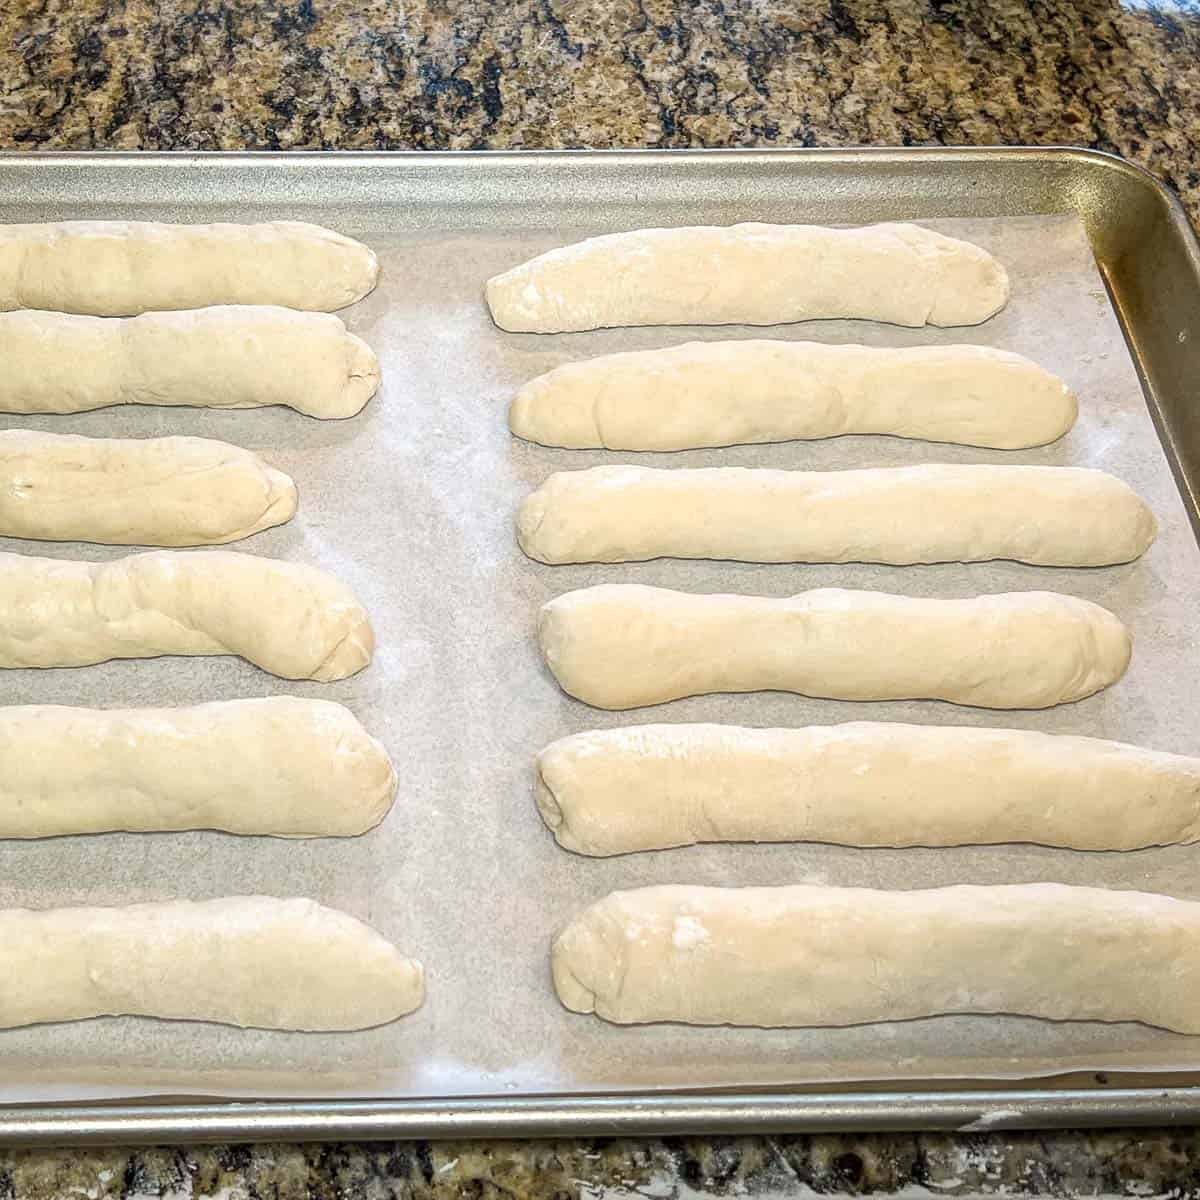
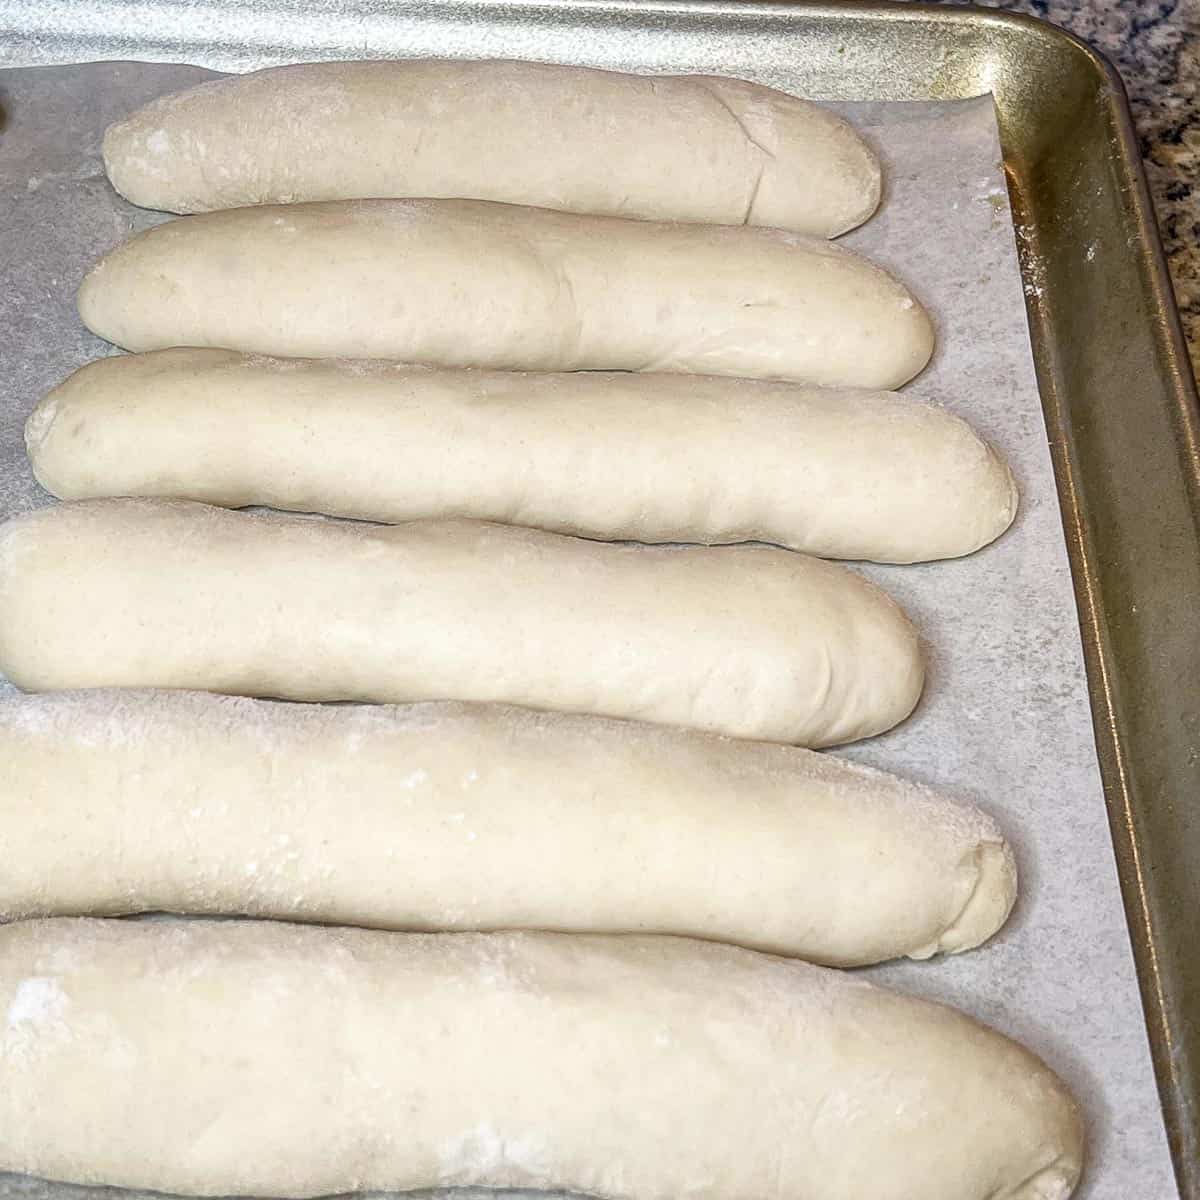
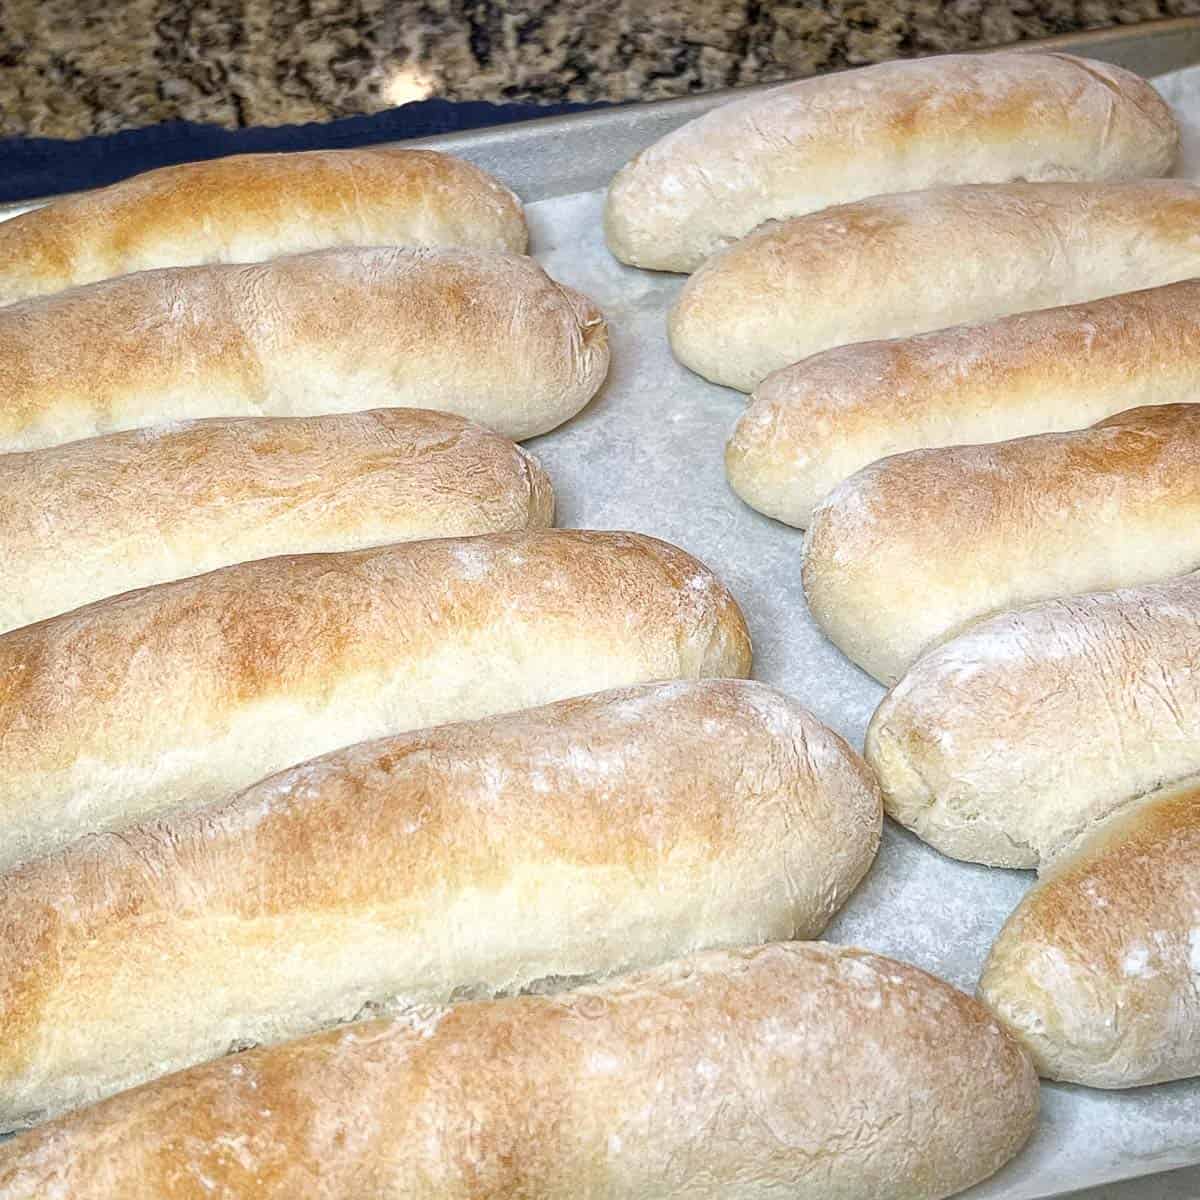
5. Form Breadsticks. Make twelve equal portions. I use a kitchen scale for accuracy. Variation: This tasty recipe can also be used to make two 12-inch pizzas.
Time Saving Tip
In a hurry? Simply roll out dough into a large rectangle about the size of a baker's sheet and use a pizza cutter to cut the dough into strips instead of rolled breadsticks. They'll be just as tasty.
Would you like to save this?
6. Final Rise (30 Minutes). Cover with a flour sack towel.
7. Bake for 15 Minutes. Watch and rotate baking sheet for even browning.
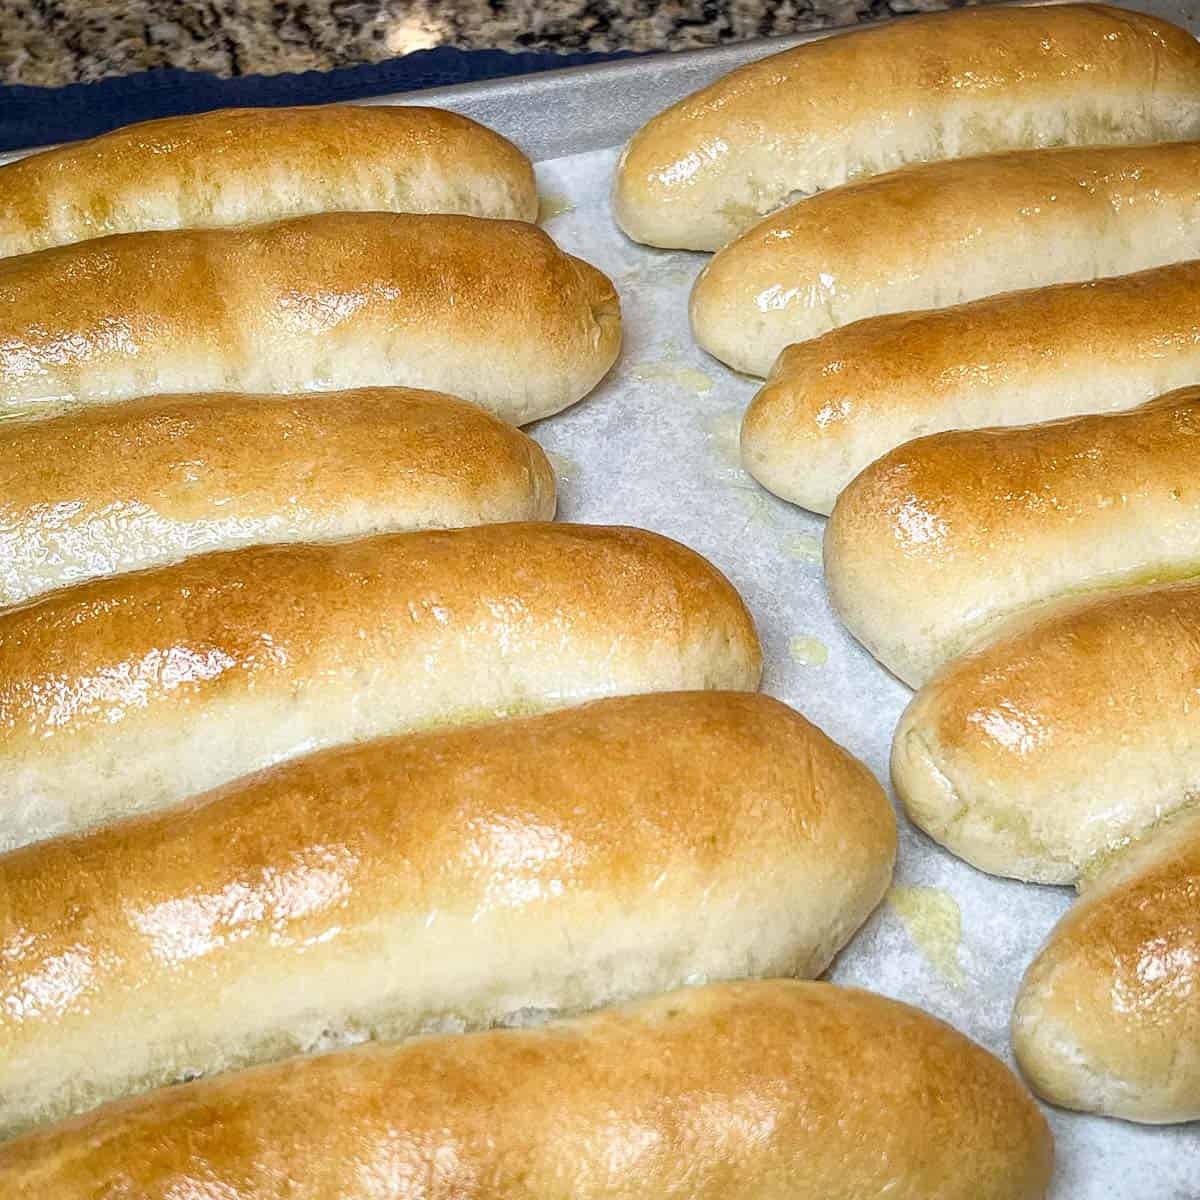
8. Finishing Touches. Brush on melted butter and sprinkle garlic salt.
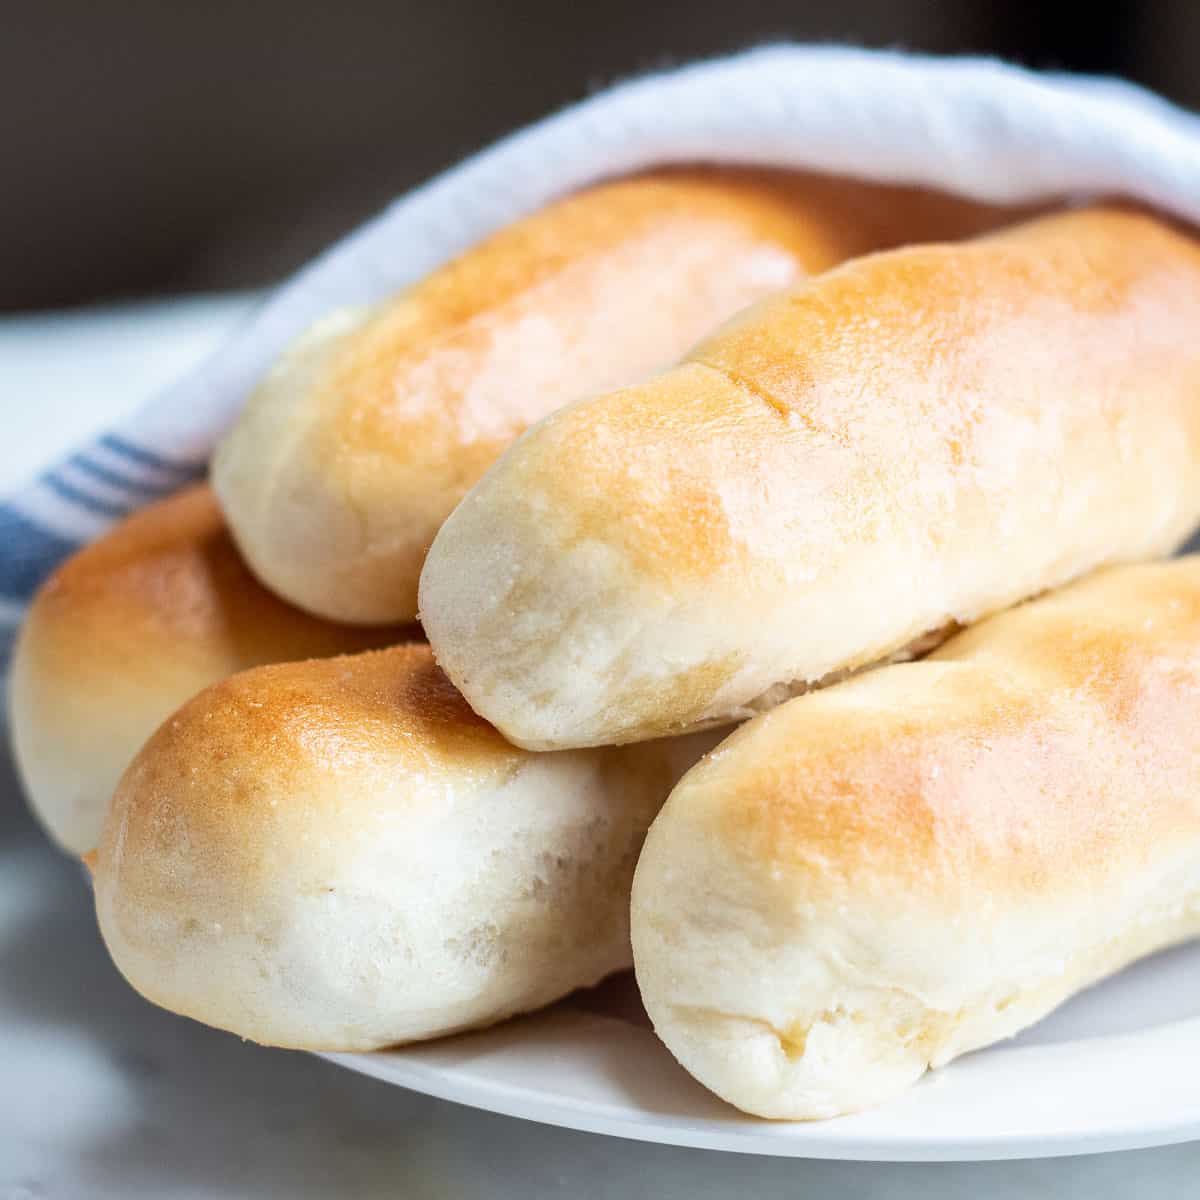
9. Serve. Irresistible served hot, right out of the oven.
Variations
You can use this garlic breadsticks recipe for all sorts of variations. Here are some ideas:
- Two 12-Inch Pizzas
- Basic Breadsticks
- Cheesy Garlic Breadsticks
- Garlic Breadsticks Stuffed with Mozzarella and Pepperoni
- Garlic Parmesan Knots
- Mozzarella Stuffed Dinner Rolls
Freezing and Reheating
Garlic Breadsticks can be easily frozen in an airtight container and reheated. To reheat, simply pull out of the freezer and microwave for 1 minute to reheat. Reheat in pre-heated to 350°F oven until heated through, for approximately 10 minutes.
There you have it. Soft and chewy, these buttery, homemade garlic breadsticks. It's as easy as that! We hope you enjoy our super simple, super tasty recipe. Try it and let us know how you like it. We'd love to hear from you.
xo ~ Seanna
Hungry for More? Subscribe to my Newsletter and follow along on Facebook, Pinterest, and Instagram for all of the latest recipes.
📖 Recipe

Homemade Garlic Breadsticks
Ingredients
- 1 ¼ cups water 95-100°, divided. ¼ Cup to proof yeast, and 1 cup for the dough
- 1 package instant yeast 2 ¼ teaspoons
- ¼ teaspoon sugar (granulated)
- 3 ½ cups all purpose flour
- ½ teaspoon salt
- 1 tablespoon olive oil
- ¼ cup butter
- ½ teaspoon garlic salt
Instructions
- Proof the Yeast. Place water, instant yeast, and sugar into a large bowl or a KitchenAid Stand Mixer with a dough hook attachment. Stir until combined and let the mixture rest for 5 minutes or until yeast begins to bubble.
- Make the Dough. Add flour, salt to yeast mixture and begin mixing on low to combine, adding the water little by little as you go. Mix together until a smooth, elastic dough ball. This should come together in about 1 minute using the stand mixer.
- Knead the Dough. Knead the dough for 8 minutes on low speed. The dough should feel pliable, yet not be either too firm or too sticky here. Make adjustments to the feel of the dough by either adding more water to loosen it up or more flour to make it less sticky.
- First Rise (60 Minutes). (See Note 1) Rub the dough ball with a tablespoon of extra virgin olive oil and set it back in the bowl. Cover the bowl with plastic wrap and let the dough rise for 60 minutes or until dough has doubled in size.
- Form Breadsticks. (See Note 2) After the doubled in size, it's time to form the breadsticks. Punch the dough down to release air from the dough.Divide the dough into twelve equal portions. You can use a handy kitchen scale to weigh proportions.Roll out each into a log form and place each on a baking sheet lined with parchment paper.
- Final Rise (30 Minutes). Cover with a flour sack towel or bus tub and let rise for about one hour or until doubled in size. Thirty minutes into this final rise, adjust the oven rack to the middle and preheat the oven to 425°F.
- Bake for 15 Minutes. After the final rise, uncover the breadsticks and set them on the middle rack in the preheated oven. Bake for 10 minutes or until golden brown. When the breadsticks are done baking, take them out of the oven and sent them on a rack to cool.
- Finishing Touches. Melt butter and brush it over the top of the breadsticks. Sprinkle garlic salt over the tops. Add any special toppings at this point. We love to add parmesan cheese.
- Serve. Serve warm with your favorite toppings or with a bowl of dunk-able soup like our delicious Cheesy Potato Soup.
Notes
- Freeze or Refrigerate Dough. After the first rise, you can divide the dough in two dough balls and either refrigerate or freeze what you don't want to use right now. Coat the dough balls with a little extra virgin olive oil and put each in a separate plastic freezer bag to store. Remove from freezer and place in refrigerator to thaw. Each dough ball will take about 12 hours to thaw inside the refrigerator. Once thawed, you can form the breadsticks for the final rise.
- Form Breadsticks Now/Bake Later. After forming the breadsticks, you can set them aside, covered, to be baked-off just before serving. I always do this ahead of time when I am entertaining guests and want to serve the breadsticks hot, right out of the oven.
Nutrition
Did you love this family recipe? As a small business, the greatest compliment you can give is a 5-star rating! Tap the ⭐⭐⭐⭐⭐ directly in the recipe card below. It helps my site grow and helps other home cooks find this nostalgic, comforting meal!
Russ B says
Awesome with the potato soup!!
Seanna says
Thanks Honey! You're the best!